Publish to the Web
This is it. We are now going to make your website available on the world wide web, where anyone can see it!
Make sure your computer person has got you some webspace ready.
There are lots of different places that Publii can publish to. But since the computer person writing this site is familiar AWS with and has already got some space ready we'll start with AWS S3.
There are easier options that Publii support - such as "ZIP". But the first person to use this guide will be hosting the site on this authors AWS space. Perhaps I'll come back later and add details for other servers.
You will need
(get this from your computer person)
- the public web address that your site will have
- AWS Access ID
- AWS Secret Key
- S3 Bucket name
- S3 Region
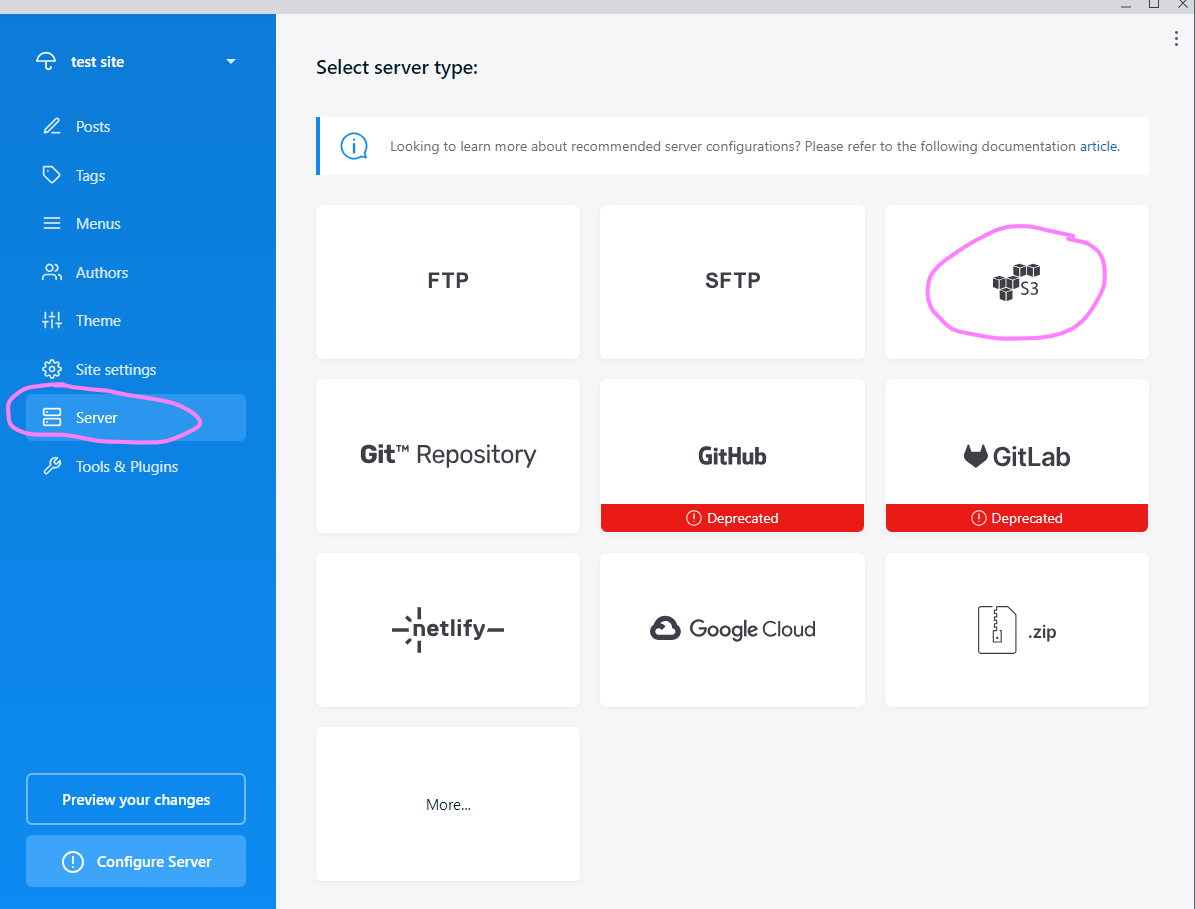
Configure
- In Publii, open the "Publsh" menu for the bottom left
- Select Amazon/AWS S3
- Enter the Website Address; Access ID, Secret Key and region
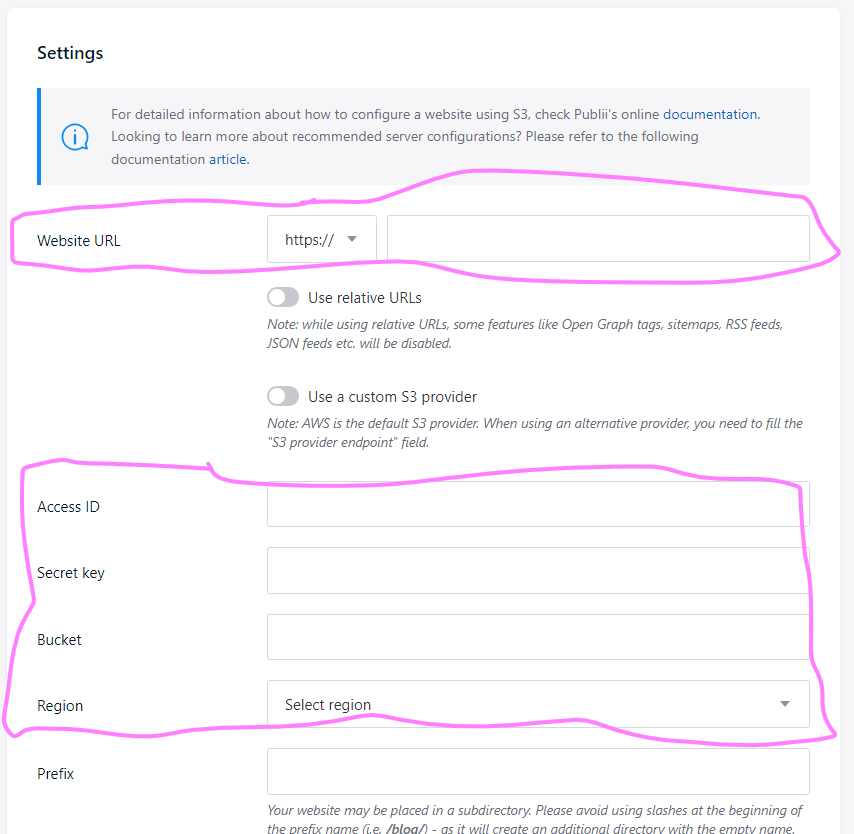
- Test the connection using the "Test Connection" button.
- If the test is successful then Save the settings
- If not successful, aks your "Computer Person" for help
Publish
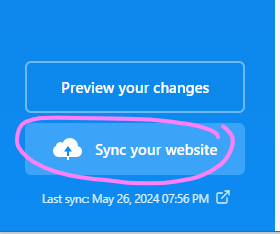
Now you can Publish your site!!
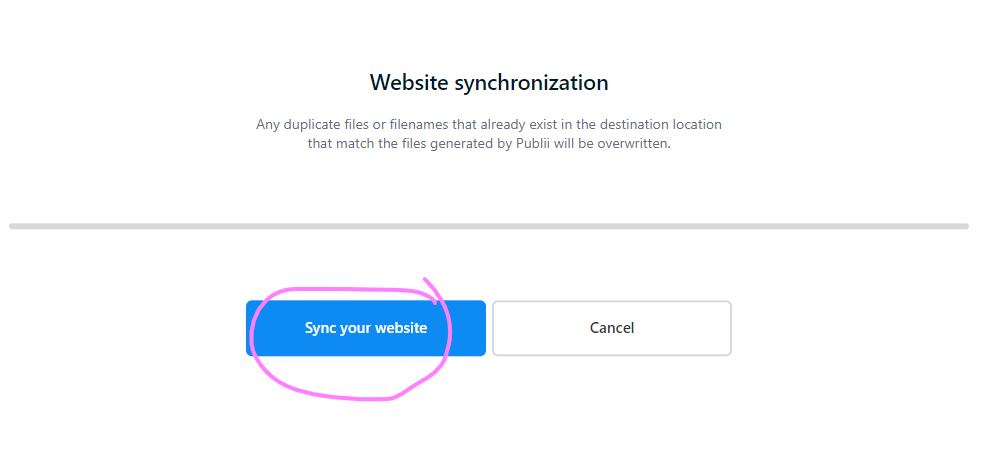
- Press the "Sync Your Website" button from the left hand navigation window
- On the next screen confirm you want to publish by pressing the "Sync Your Website" button on
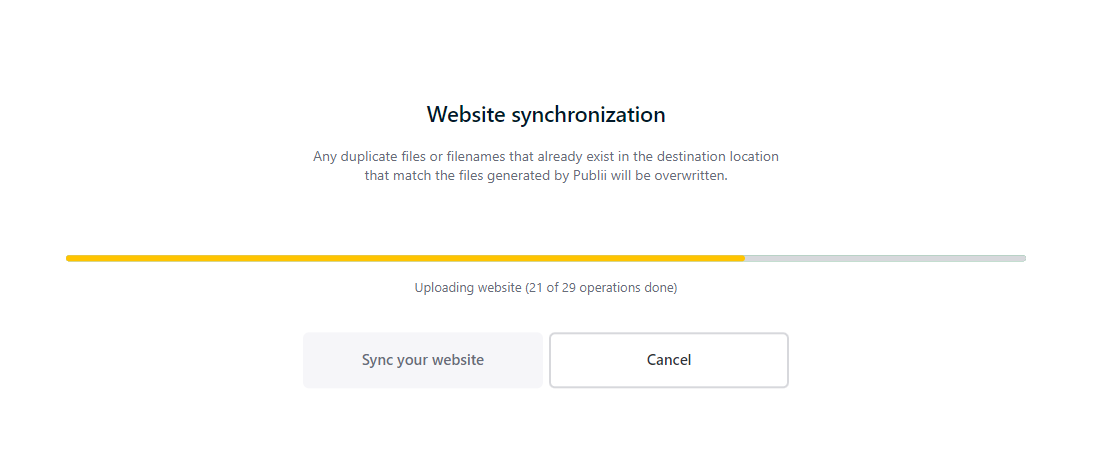
- Publii will generate the HTML; CSS and different sizes of images for your site from the posts/images/themes you have configured. And then it will upload them..
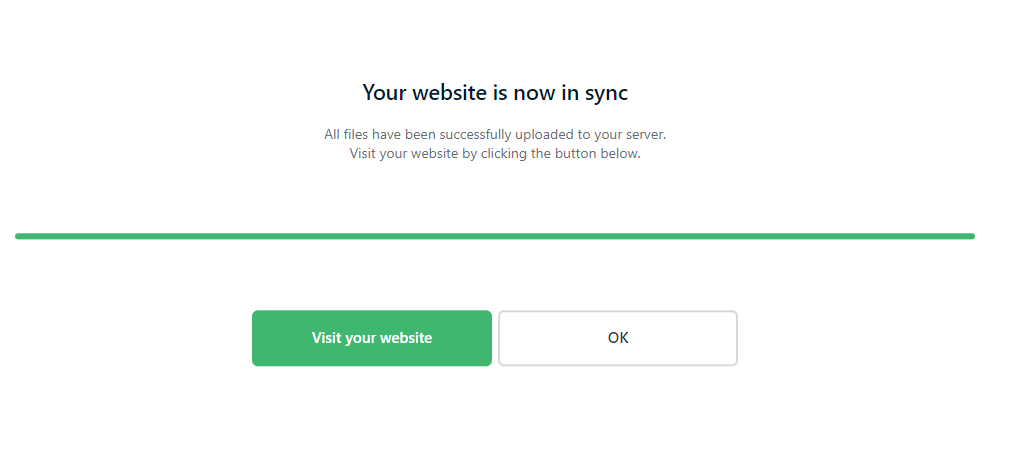
- It's done!
Look at your site
- open the web address you were given in your web browser
- or click the "Visit your website" button shown on the screen after syncronisation is complete.
What next?
If you are anything like me you will probably notice a spelling mistake or two. or thing of another page picture or link you want to add.
So you fix those spelling mistakes, add those links & upload those new pages. Then Press the "Publish" button again and see how easy it is to change things!
More?
See more details on web sites and web servers
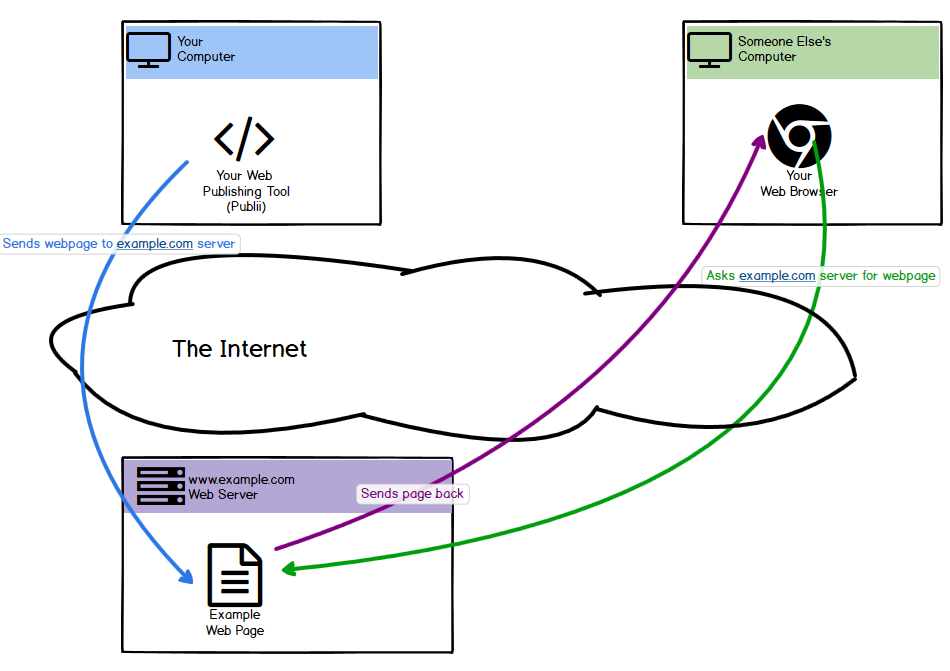
Websites are just a collection of files stored on a computer that is connected to the internet. When you publish a website to a webhost like S3 you are sending those files to that computer. That computer has some special software on it called a "web server" that knows how to speak to Web Browsers (like Google Chrome, Edge, or FireFox). When a Web Broswer asks for a page on your website the webserver takes a look at the files it has and then sends that file to the browser.