Navigation Menu
You may have noticed that most website have a list of links in the site header at the top of the page that take you to different parts of the site. This is often called the navigation menu (or header menu).
For example:

Let's create a navigation menu for your site.
Creating a menu
The menu we create will be the same as your site outline plan
- Open your site in Publii
- Select the "Menus" button from the left hand side.
- Create a new menu
- In the box that opens name the menu "Navigation"
- this menu will contain our individual menu items
- Click on "Navigation" to open the details for the new menu
- Open the "Add Menu Item" panel
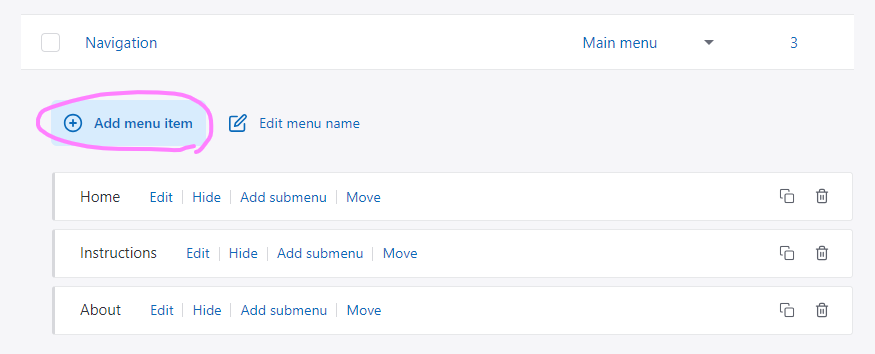
- Each "menu item" will become a link to a part of our site
- Fill in the details for the Home item
- Give it the name Home
- From the "type" dropdown choose "Front page"
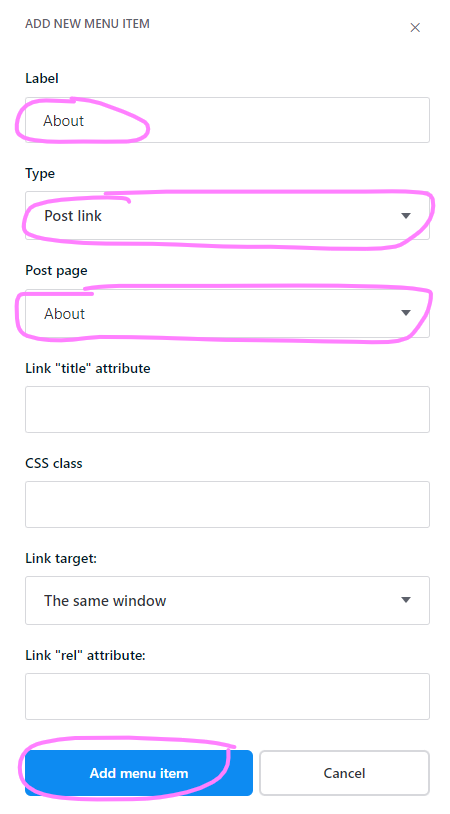
- And another menu item
- this will be a menu item that points to one of the pages you have created
- Give it a Label
- this will probably be the same as the title of the page it will point at, but it could be a shorter version if the page title is long.
- For "Type" choose "Post link"
- A "Post Page" dropdown will appear
- For "Post Page" select the page you want to link
- Then click the "Add menu item" button to add the item.
- Add more items for the other important/top level pages on your site


Making the menu visible
Where the menu is shown depends on the Theme (see the Themes section to find out more about themes)
To make the menu visible we must "assign" it to one of the menus areas that the Theme provides.
Fortunatly most themes provide a "Main menu" area that is show in the header.
- To the right hand side of our menu name ("Navigation") you will see "Unassigned"
- Click the dropdown next to "unassigned"
- a pop-up form will appear
- Toggle the switch to enable "main menu"
- Click Save